¶ 📋 Prerequisites
- ✅ Trimble receiver
- ✅ Trimble controller with Trimble Access
- ✅ Access to an RTK base station broadcasting RTCM3 via UHF (e.g. SATEL) on a known frequency
- ✅ Correct radio parameters (baud rate, frequency, protocol)
- ✅ Base and rover should both be configured to compatible modulation, baud rate, and radio protocol (e.g. SATEL@19200)
¶ 🧭 Step-by-Step Setup
¶ 1. Power on and connect to the rover
- Turn on your rover.
- Connect to it using Trimble Access via Bluetooth.
- Launch a new survey project or enter an existing one.
¶ 2. Set Survey Type
Go to:
Survey > Instrument > Rover Options

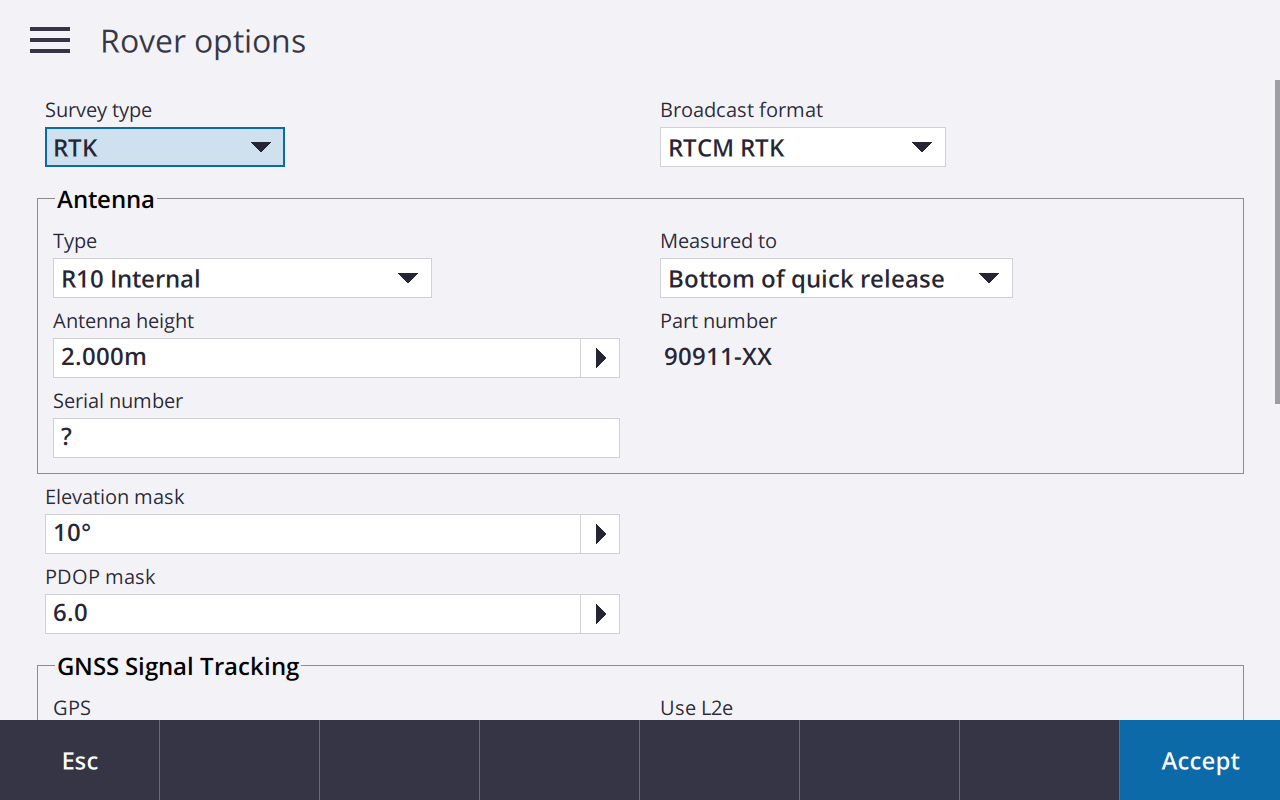
Set the following:
- Survey type:
RTK - Broadcast format:
RTCM RTK✅ - Antenna type:
R10 Internal(or appropriate) - Antenna height: (e.g.
2.000 m, or appropriate) - Measured to:
Bottom of quick release(or depending on your mount) - Elevation mask:
10° - PDOP mask:
6.0(adjustable depending on satellite visibility)
✅ Click Accept
¶ 3. Configure Rover Data Link
Navigate to:
Survey > Instrument > Rover Data Link
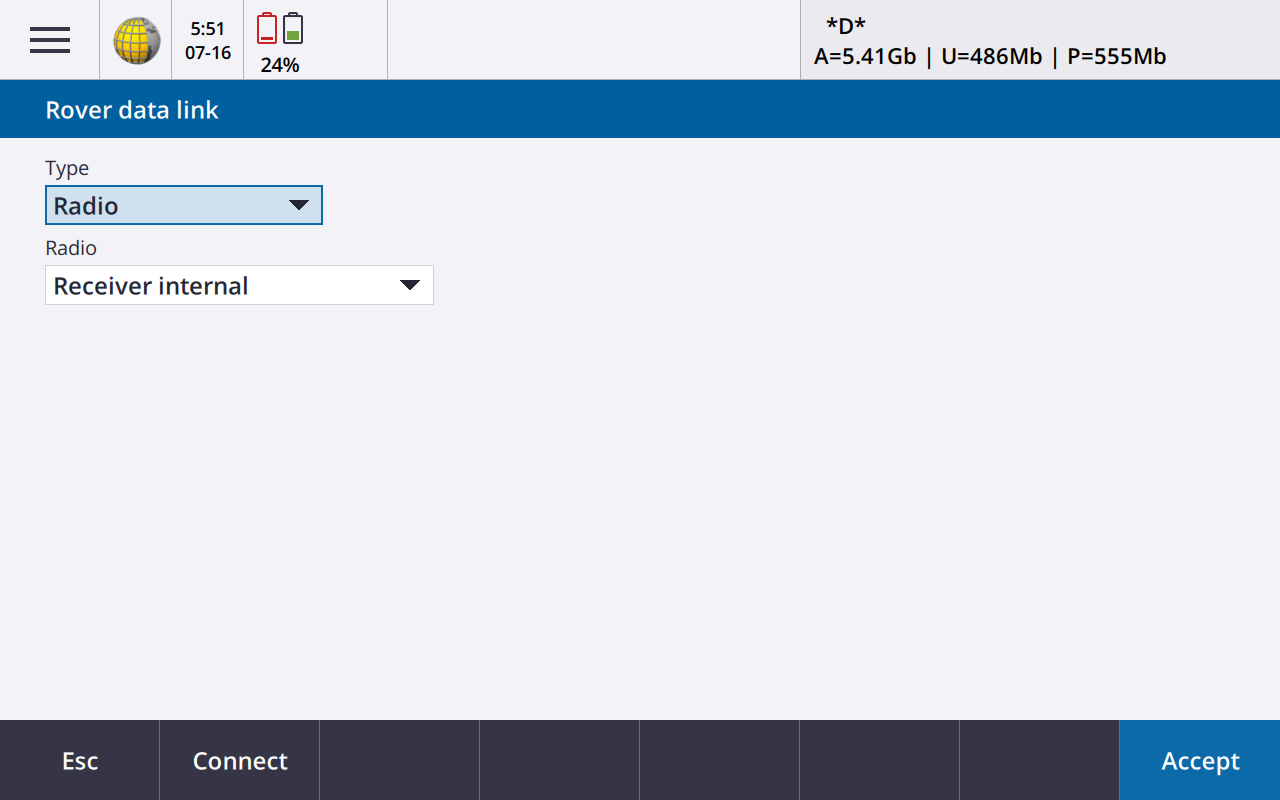
Set:
- Type:
Radio - Radio:
Receiver internal
This tells the rover to listen to RTCM3 messages using its built-in UHF modem.
✅ Click Accept
¶ 4. Configure Radio Parameters
Hit connect button in the same screen

Set:
- Connected to:
Receiver internal - Frequency:
440.47500 MHz(⚠️ Must match base station frequency) - Radio operating mode:
Rover - Base radio mode:
SATEL@19200(⚠️ Must match base station baud rate and protocol)
If the base station uses a different protocol (e.g. Pacific Crest, TrimTalk, etc.), choose accordingly.
✅ Click Accept
¶ 5. Start Survey
Once radio link is configured:
- Go back to the main Survey menu.
- Start the RTK survey.
- If everything is correct and the base is transmitting, the rover will lock to RTCM3 corrections and status will show:
- Fix mode:
*D*orFIXED - Satellite tracking
- Corrections incoming
- Fix mode:
✅ You're now ready to collect RTK data!