¶ Tutorial: Importing a projection and/or Geoid Model into 3DMC
This step‑by‑step guide shows you how to load a geoid file and/or custom projections and apply it to your coordinate system in 3DMC.
¶ Prerequisites
- 3DMC installed and running.
- A usb stick with on root the files:
- Geoid file (
*.gff) available on a USB stick or other removable media. - userprojections.xml defining the custom projections (exemple below)
- Geoid file (
<data>
    <Projection>
        <Name>ETRS89 / UTM zone 32N (zE N)</Name>
        <DisplayName>ETRS89 / UTM zone 32N (zE N)</DisplayName>
        <Comment>ETRS89 / UTM zone 32N (zE N)</Comment>
        <Code name="EPSG">4647</Code>
        <Unit>Meters</Unit>
        <Datum>ETRS89</Datum>
        <AnyDatum>0</AnyDatum>
        <Region>Deutschland</Region>
        <Type>TMERC</Type>
        <P0 name="Central Meridian">90000.00000</P0>
        <P1 name="Scale">0.9996</P1>
        <P2 name="Lat0">00000.00000</P2>
        <P3 name="East0">32500000</P3>
        <P4 name="North0">0</P4>
    </Projection>
</data>
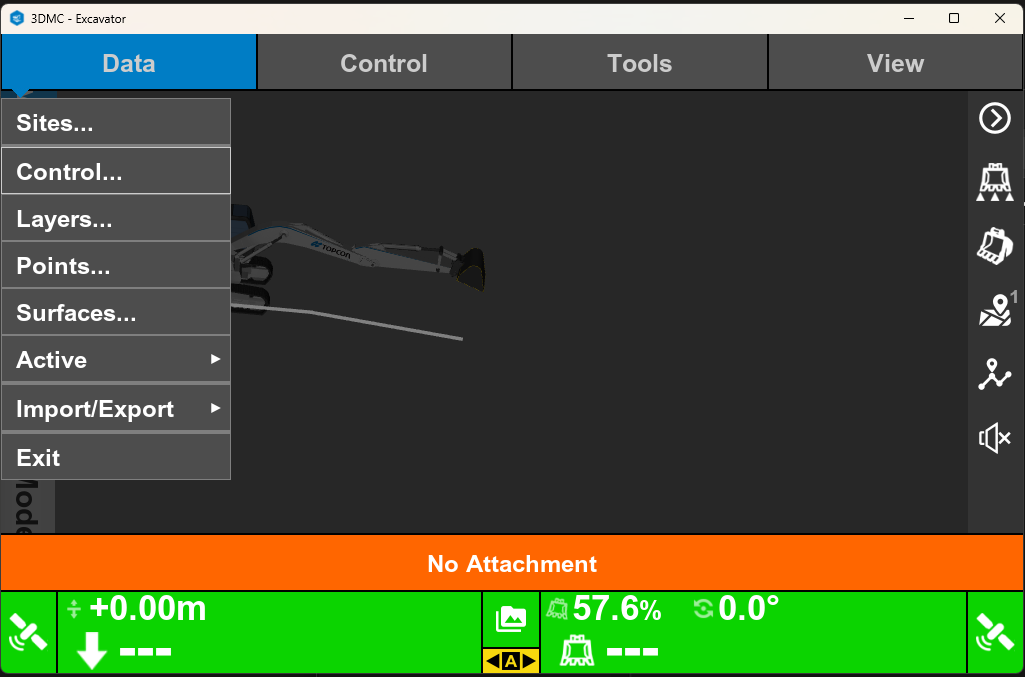
¶ 1. Open the Data Menu
- In the top toolbar, click Data.
- From the dropdown, choose Control....
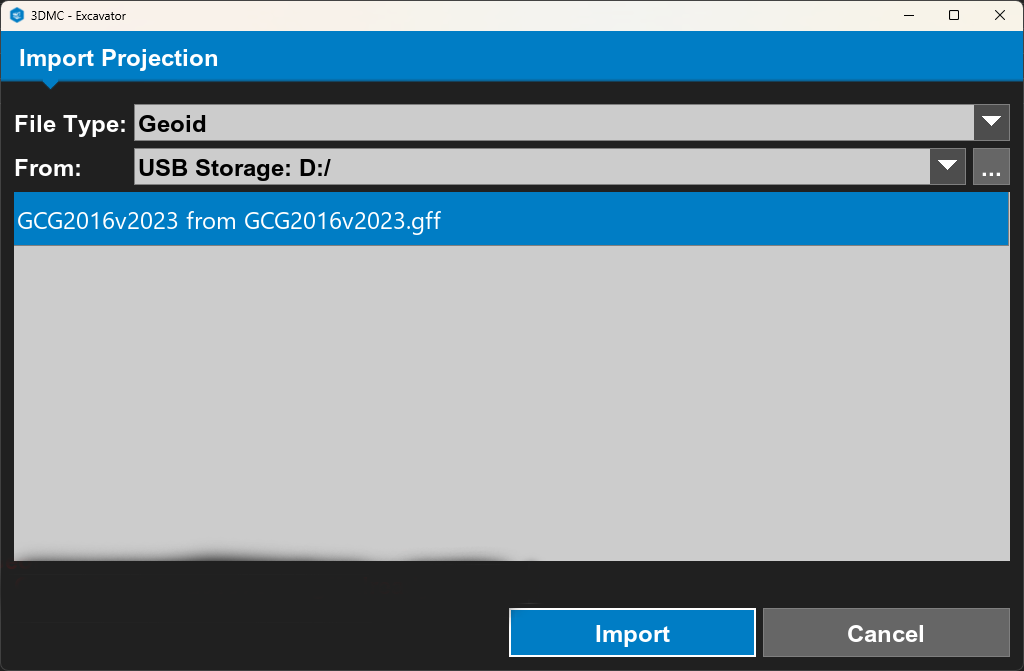
¶ 2. “Import Projection” Dialog
- In the "Projection tab" hit "Import" button
- In the File Type dropdown, select Geoid.
- In the From field, browse to your USB drive (for example,
USB Storage: D:/). - In the file list, click on the .gff file.
- Press the Import button.
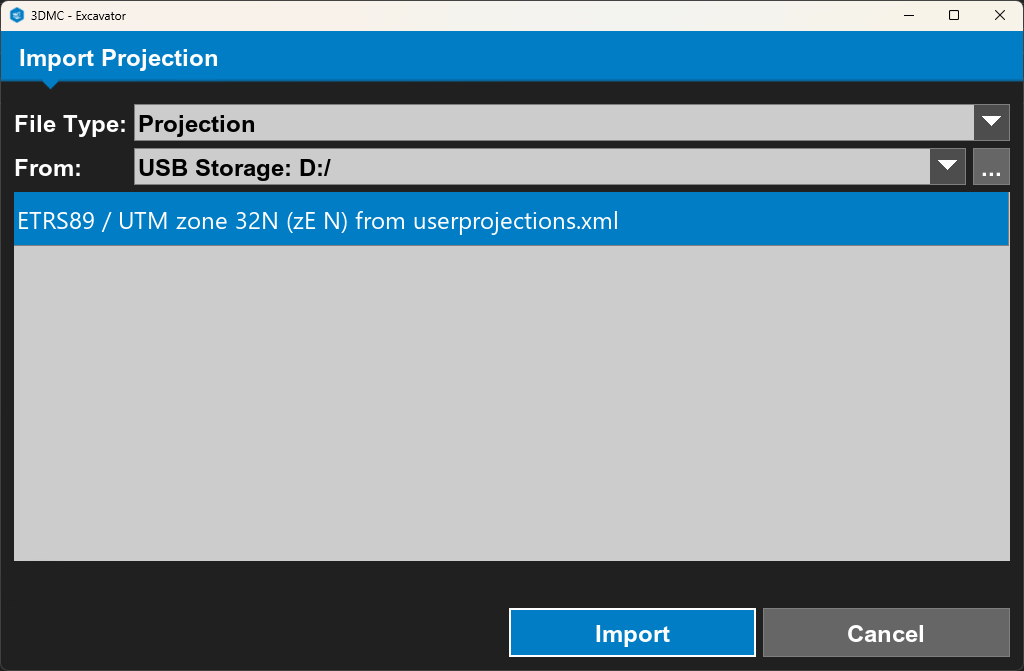
Do the same for projection:
- In the "Projection tab" hit "Import" button
- In the File Type dropdown, select Projection.
- In the From field, browse to your USB drive (for example,
USB Storage: D:/). - In the file list, click on the userprojections.xml file.
- Press the Import button.
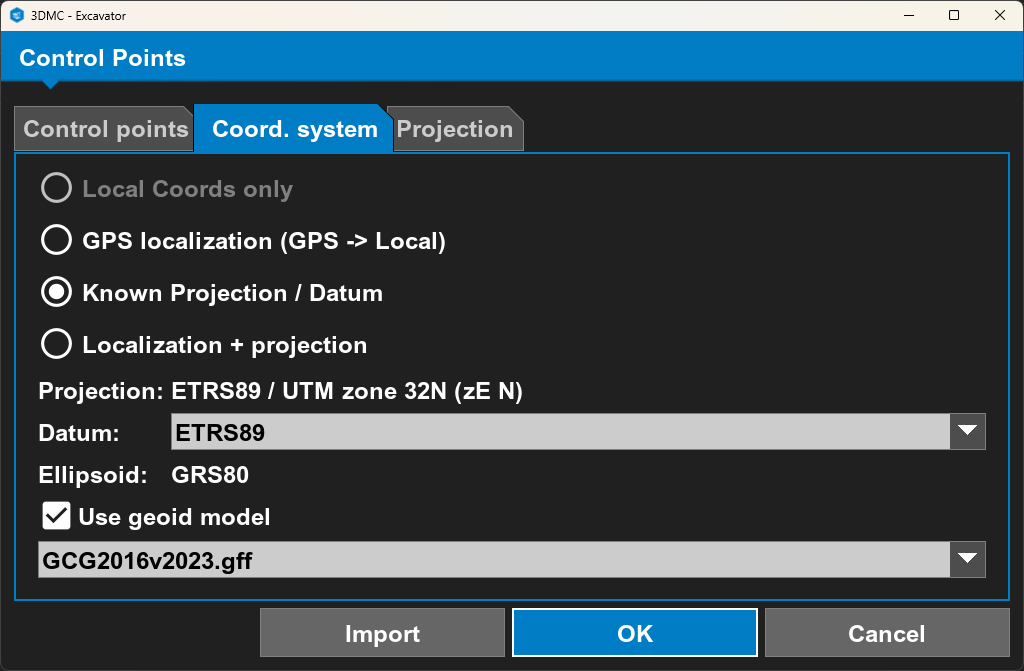
¶ 4. Configure Your Coordinate System
-
Back in the Data menu, select Control... and open the Coord. system tab.
-
Choose Known Projection / Datum.
-
Verify or set Projection:: (your project’s projection)
-
Check the box Use geoid model.
-
From the dropdown, select the geoid.
-
Click OK to apply.
¶ 5. Final Verification
- TODO