This document explains how to prepare and process photogrammetric acquisition with the DJI Phantom4 RTK.
¶ At the office
¶ Area preparation
- Create a polygon of the survey area for example in google earth and make a kml file
- Remove SD card from the controller slot, use a USB3.0 adapter and connect it on computer.
- On computer navigate to folder DJI/KML.
- Copy the kml file on this folder.
¶ Flight plan preparation
-
Replace SD card into controller.
-
Power on the controller type on menu (upper left of screen):
-
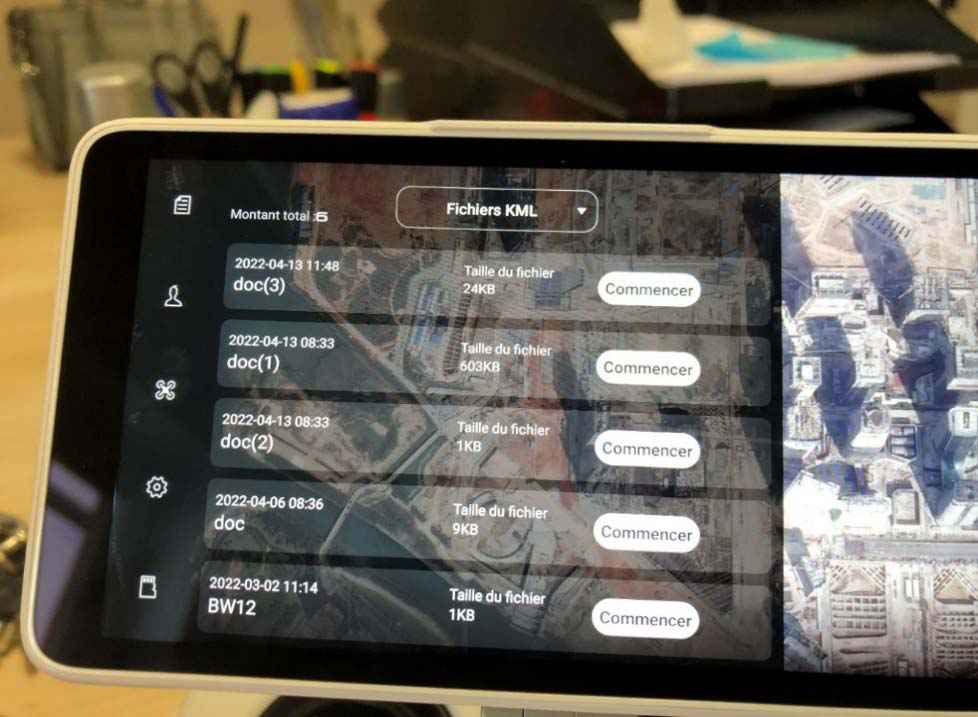
Go to SD card (down left):
-
Import the kml.
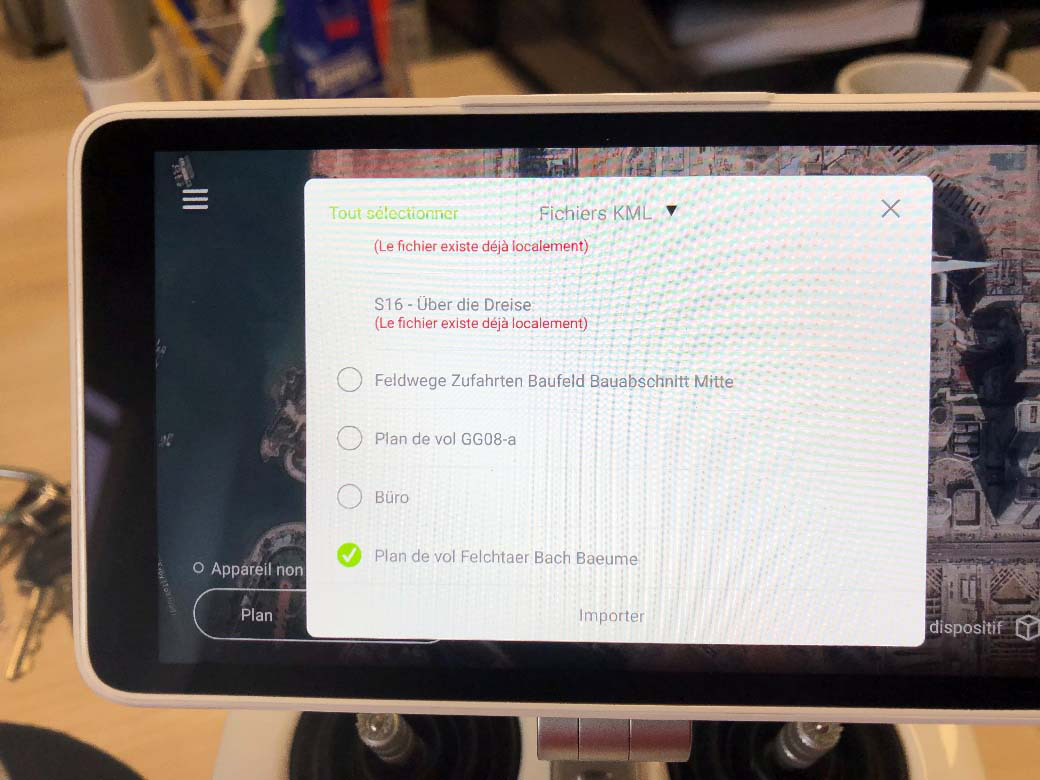
-
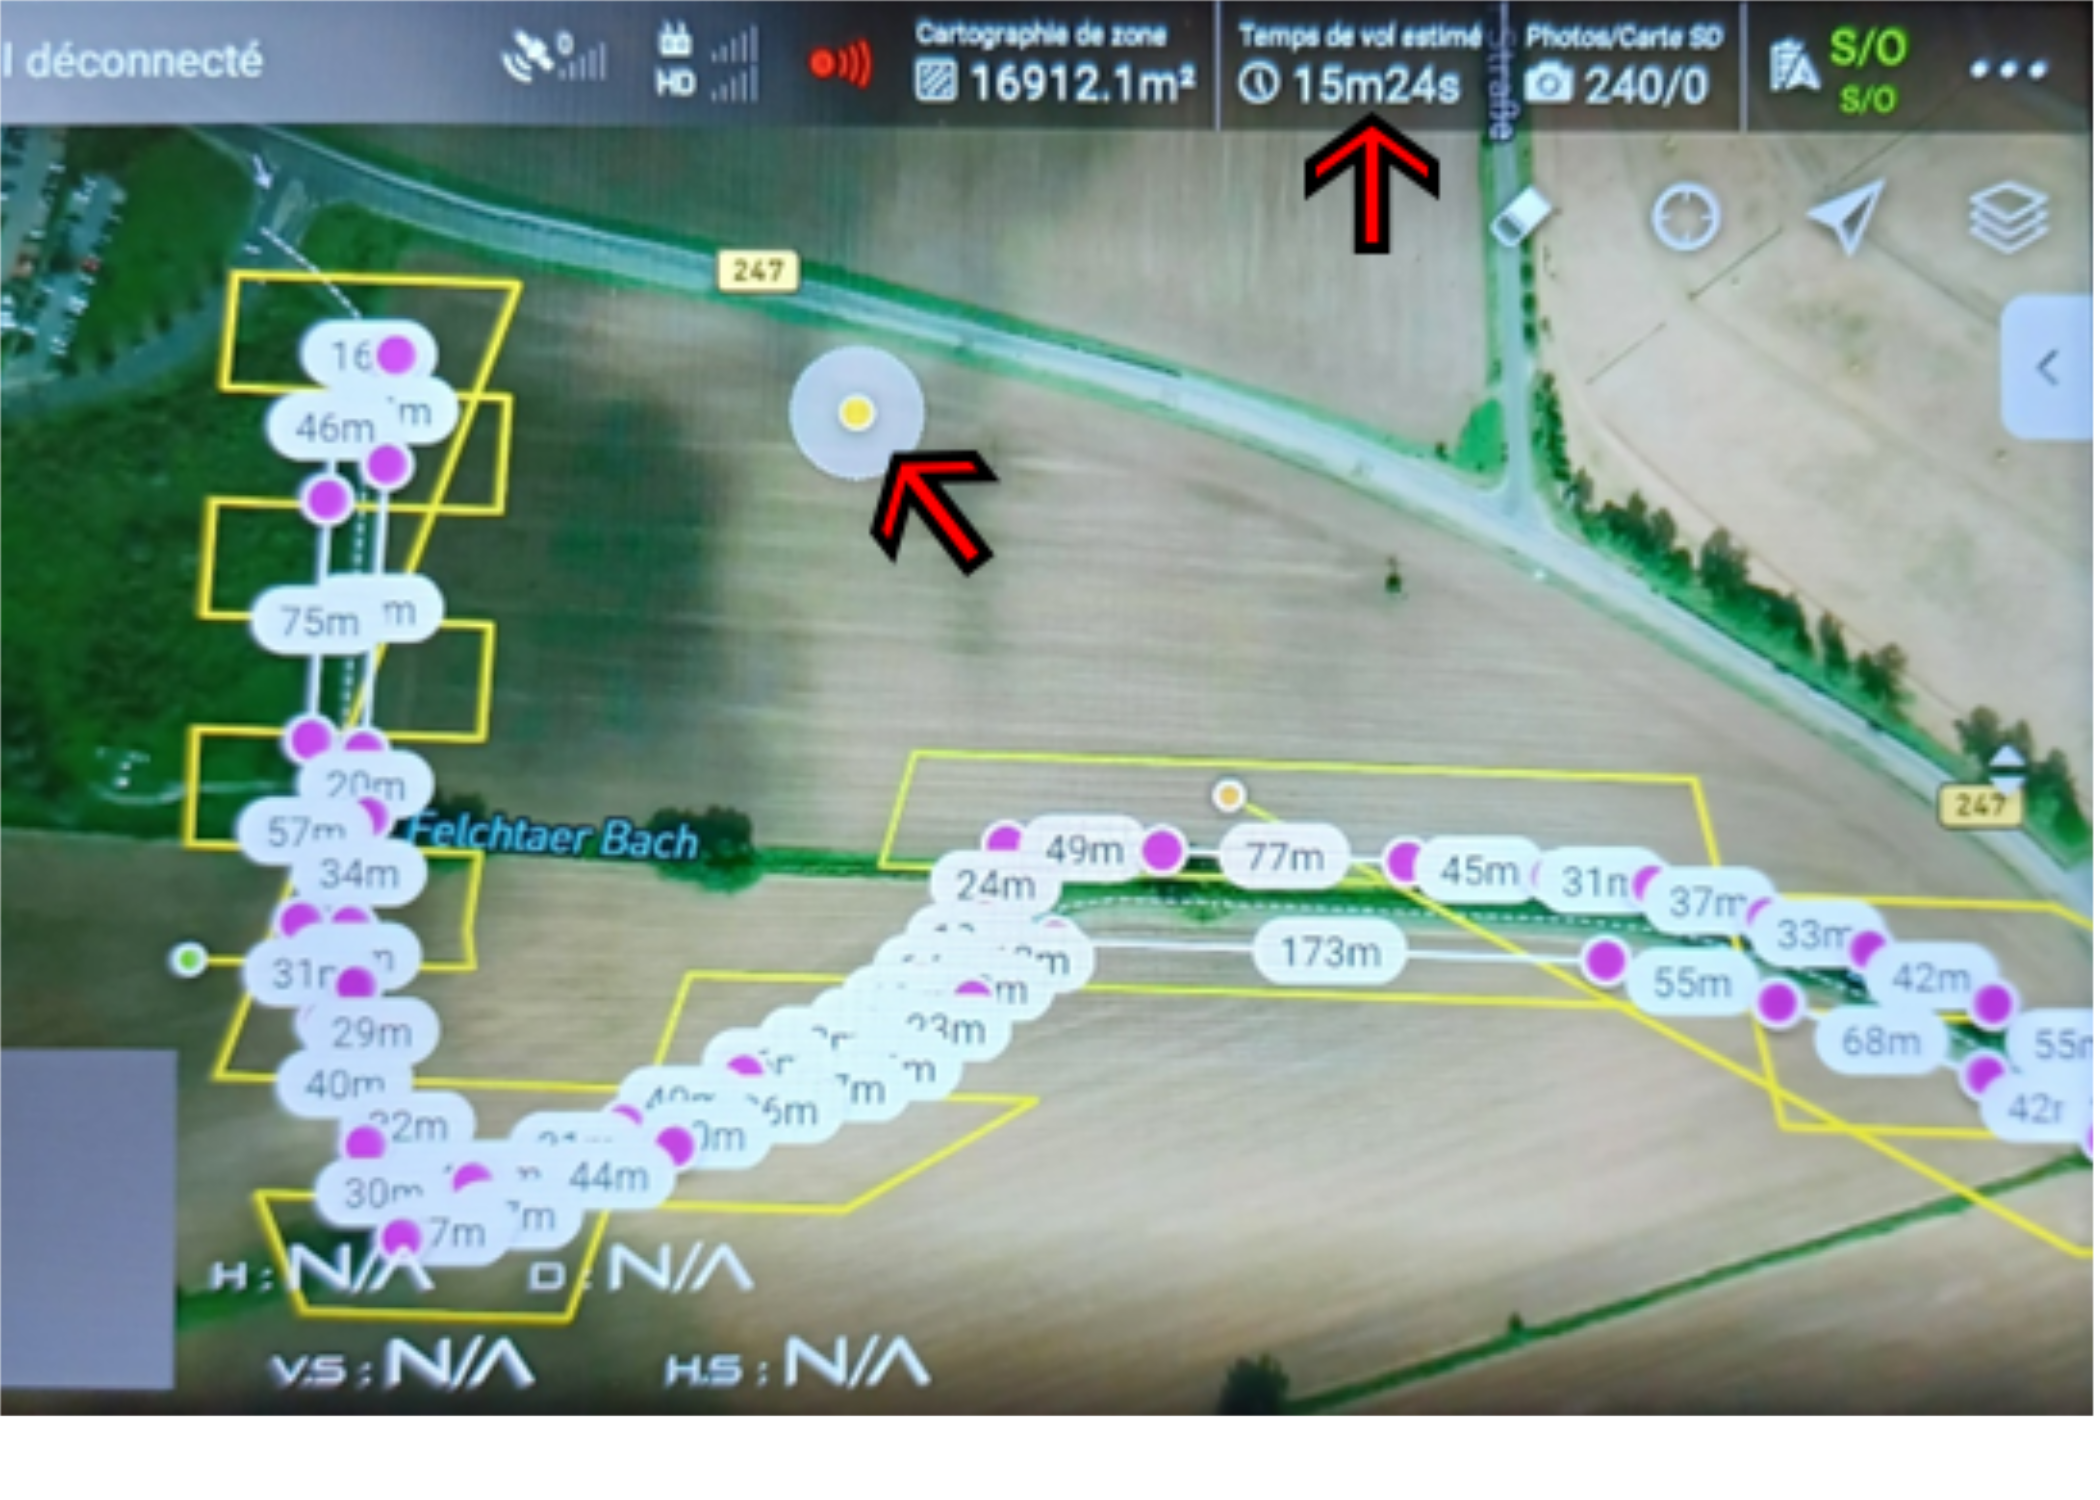
The plan view of the file appears, click on Modify at the bottom right.
If it does not appear, in the main menu click on the icon (top left) and on select KML file in a drop-down list. Select the correct KML file. The tablet automatically zooms on the area concerned
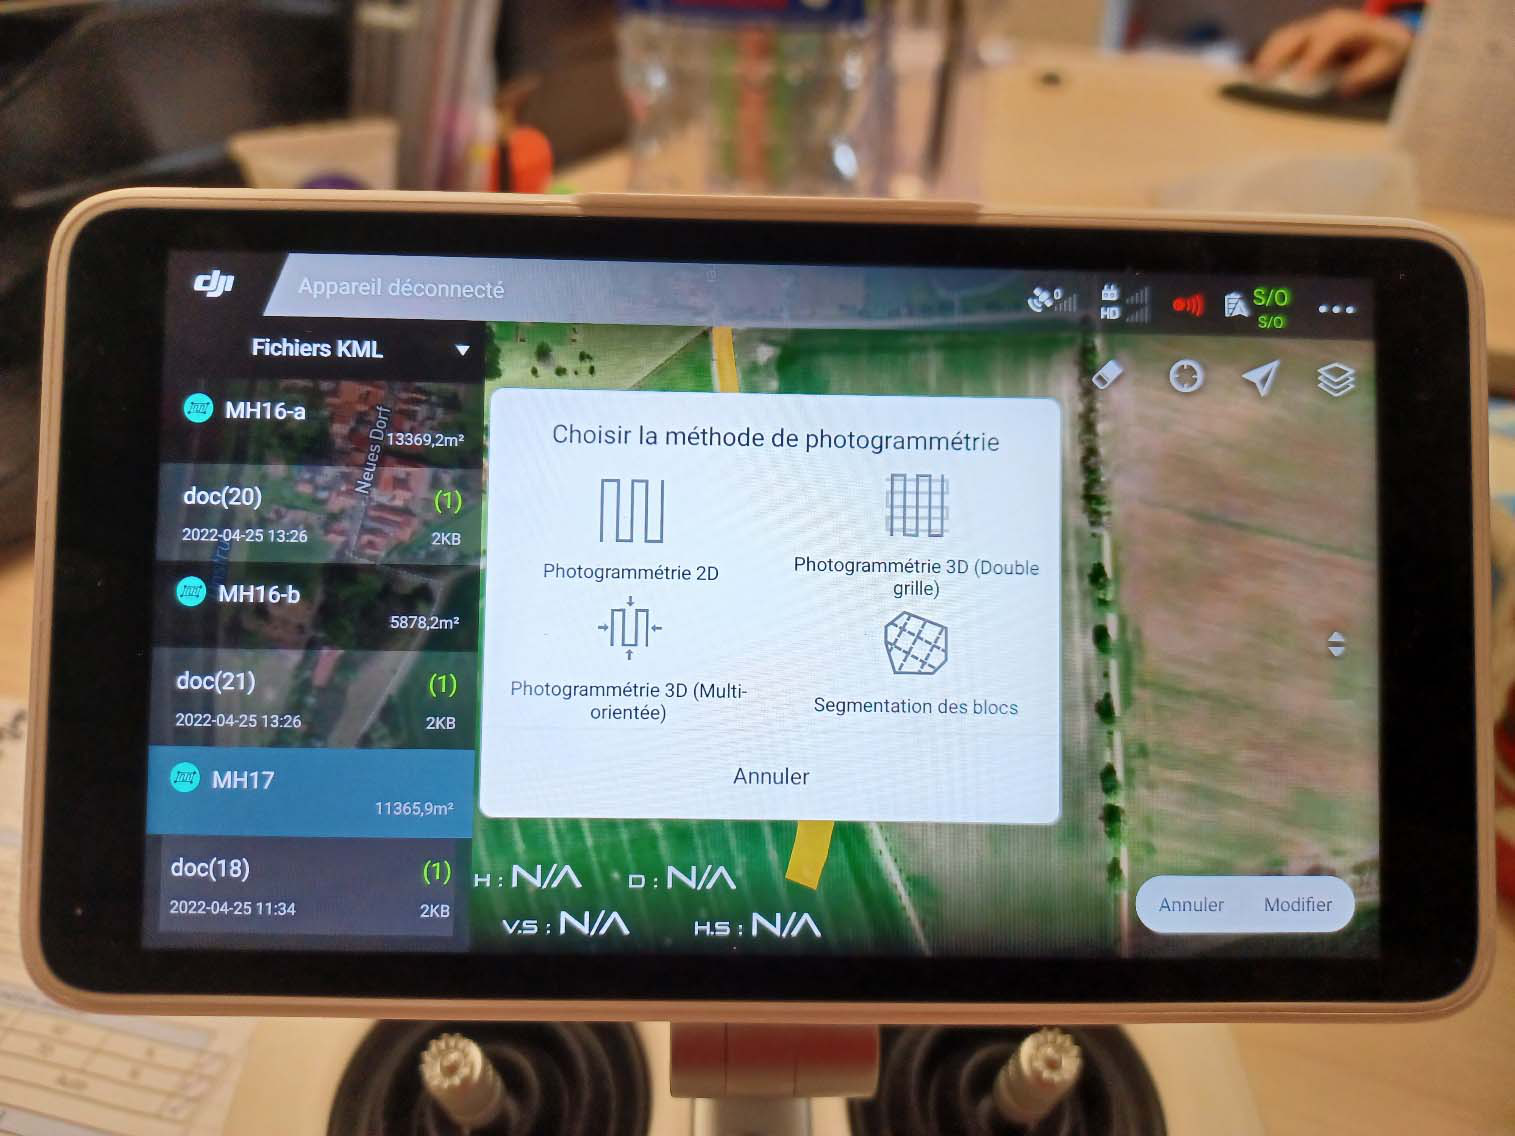
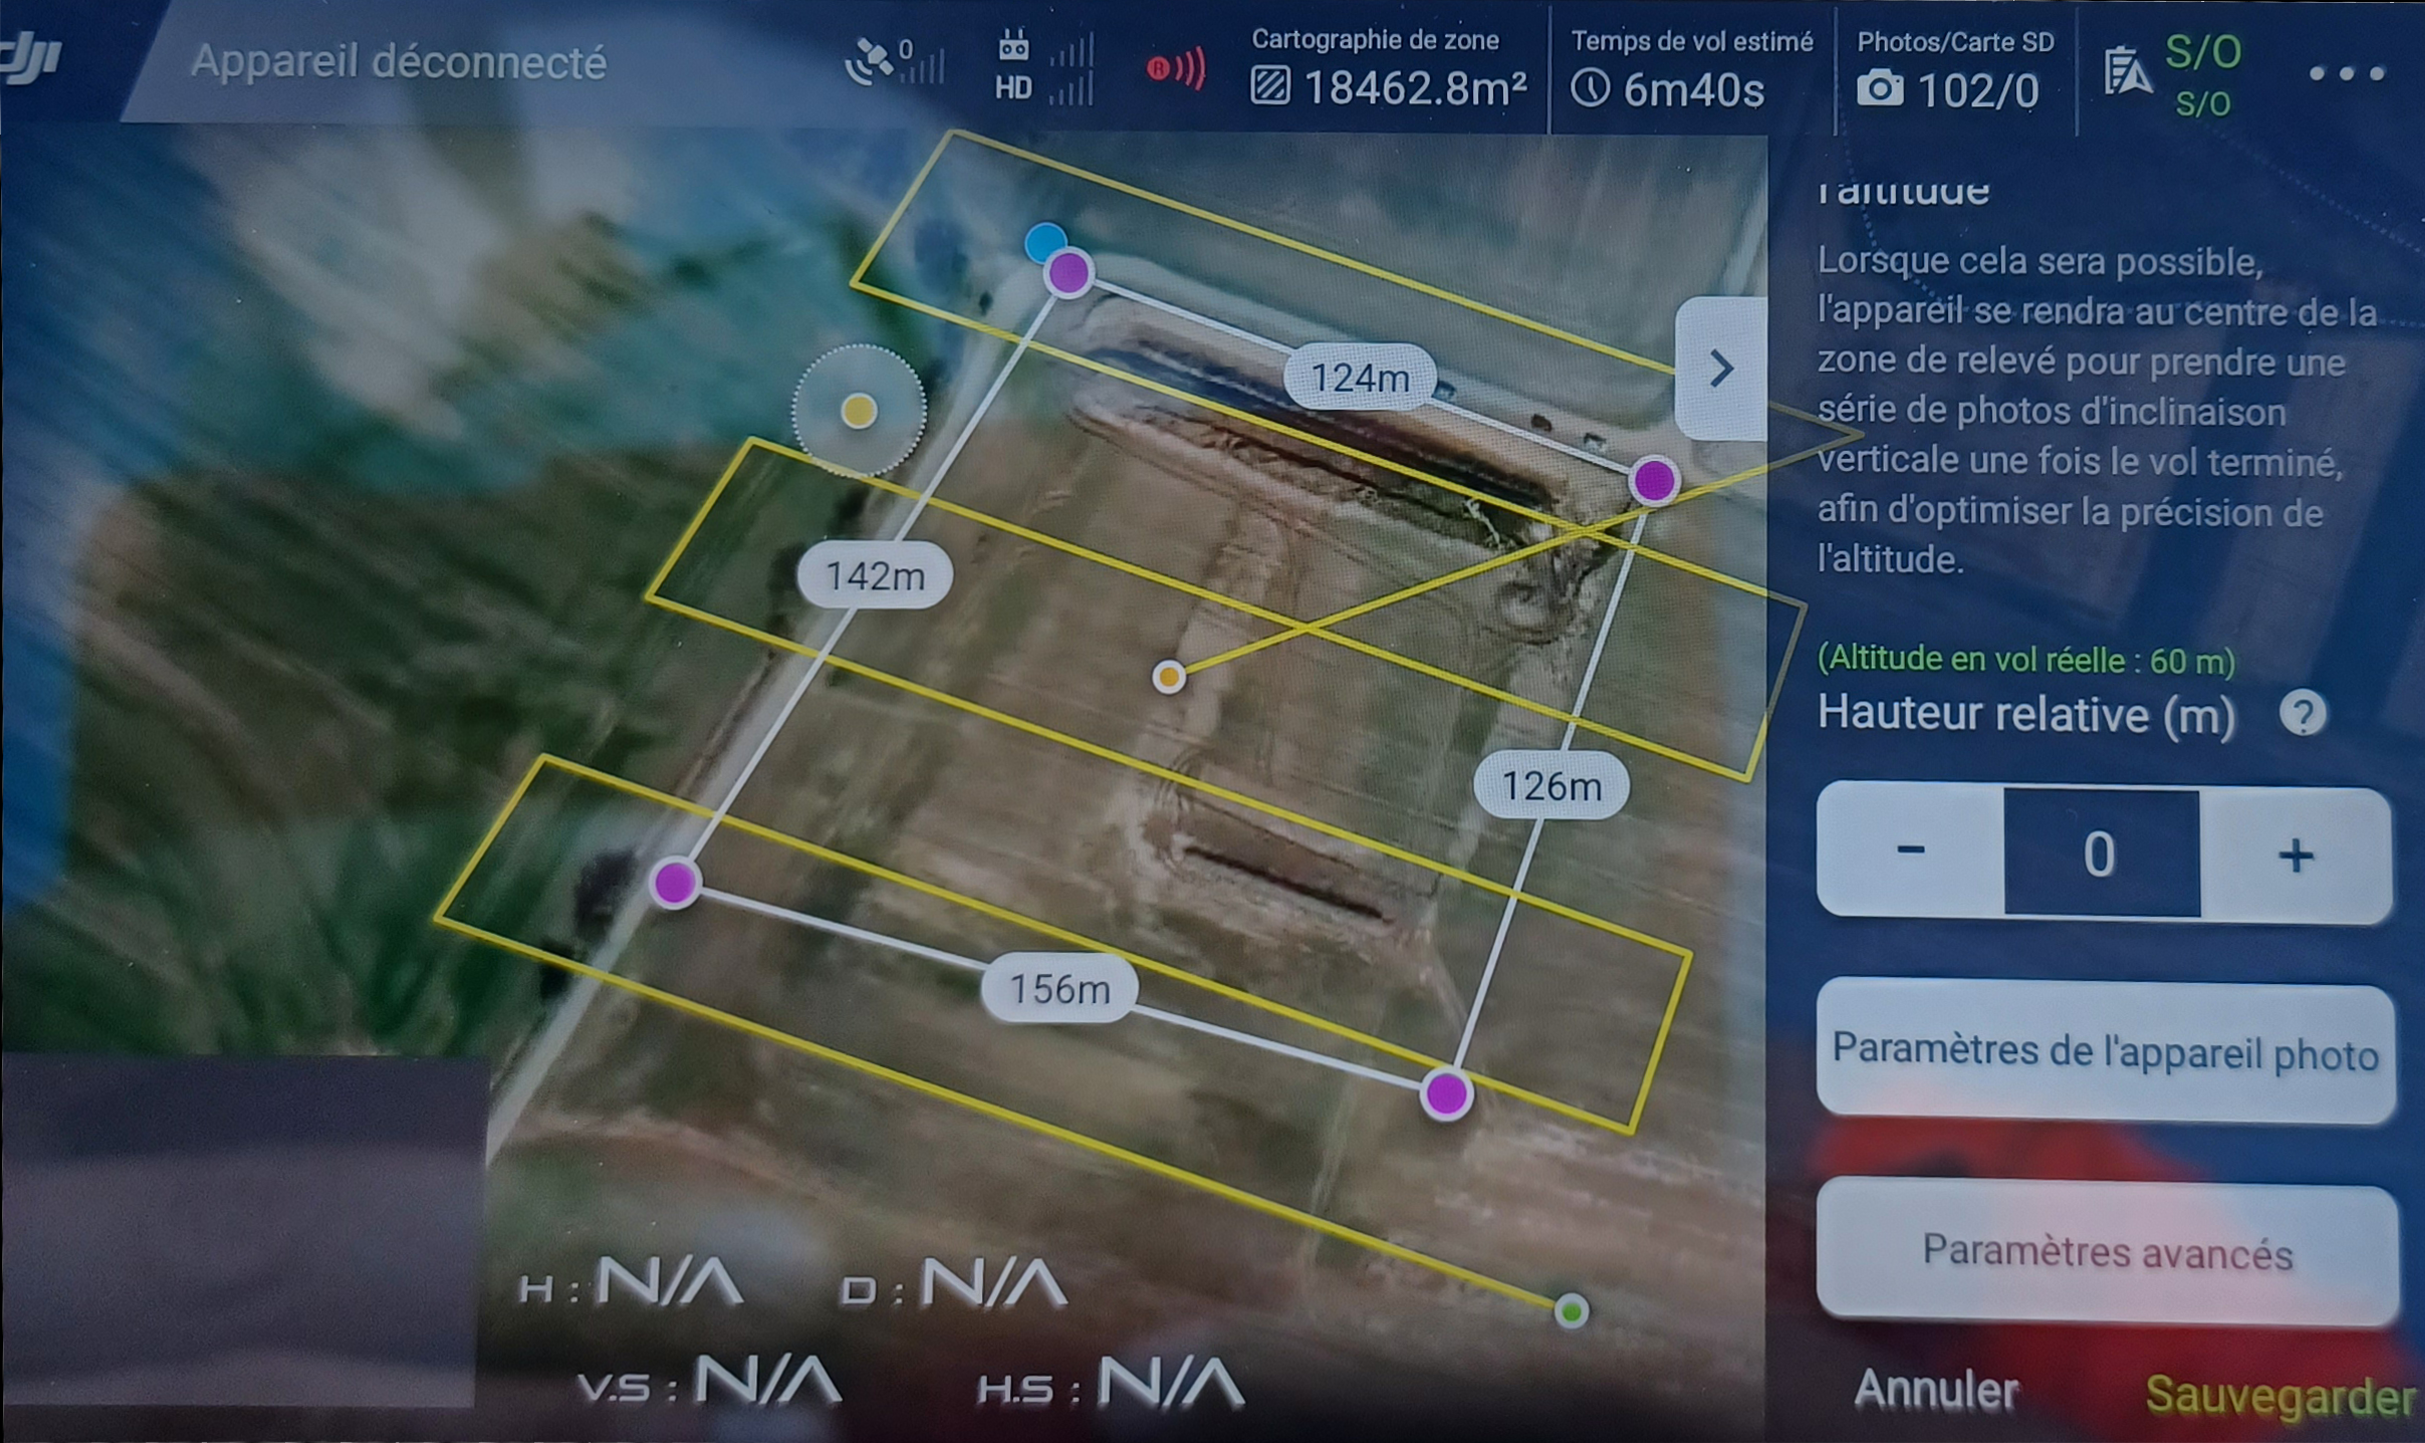
- Once you have selected the correct plan view, and click Modify at the bottom right, another window appears. Select 2D Photogrammetry.
It is possible to select 3D Photogrammetry (Double grid) but only to make flights close to buildings and you would like to have a better definition for the facades.
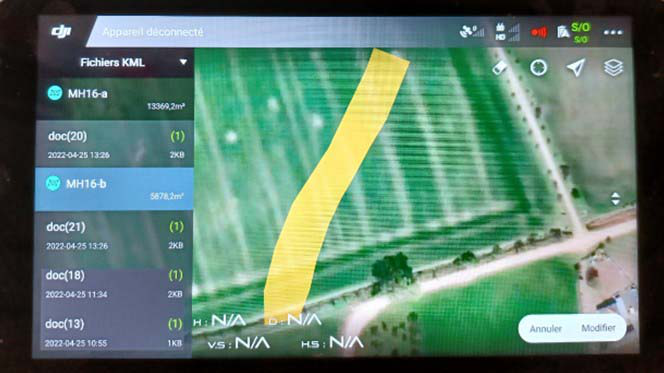
- When the plan view appears, you can modify the polygon (purple points and white line) or delete points by double-clicking on one of the purple points. Adjust the polygon if necessary, by zooming and clicking on it.
- To optimize the flight trajectory (yellow line), move the yellow dot to vary the orientation of the flight and reduce the estimated flight time.
Be careful: there are 2 yellow dots. A small one which shows the position of the end of the flight, and another surrounded by a halo which is the one to use.
- In the right panel set the flight parameters to:
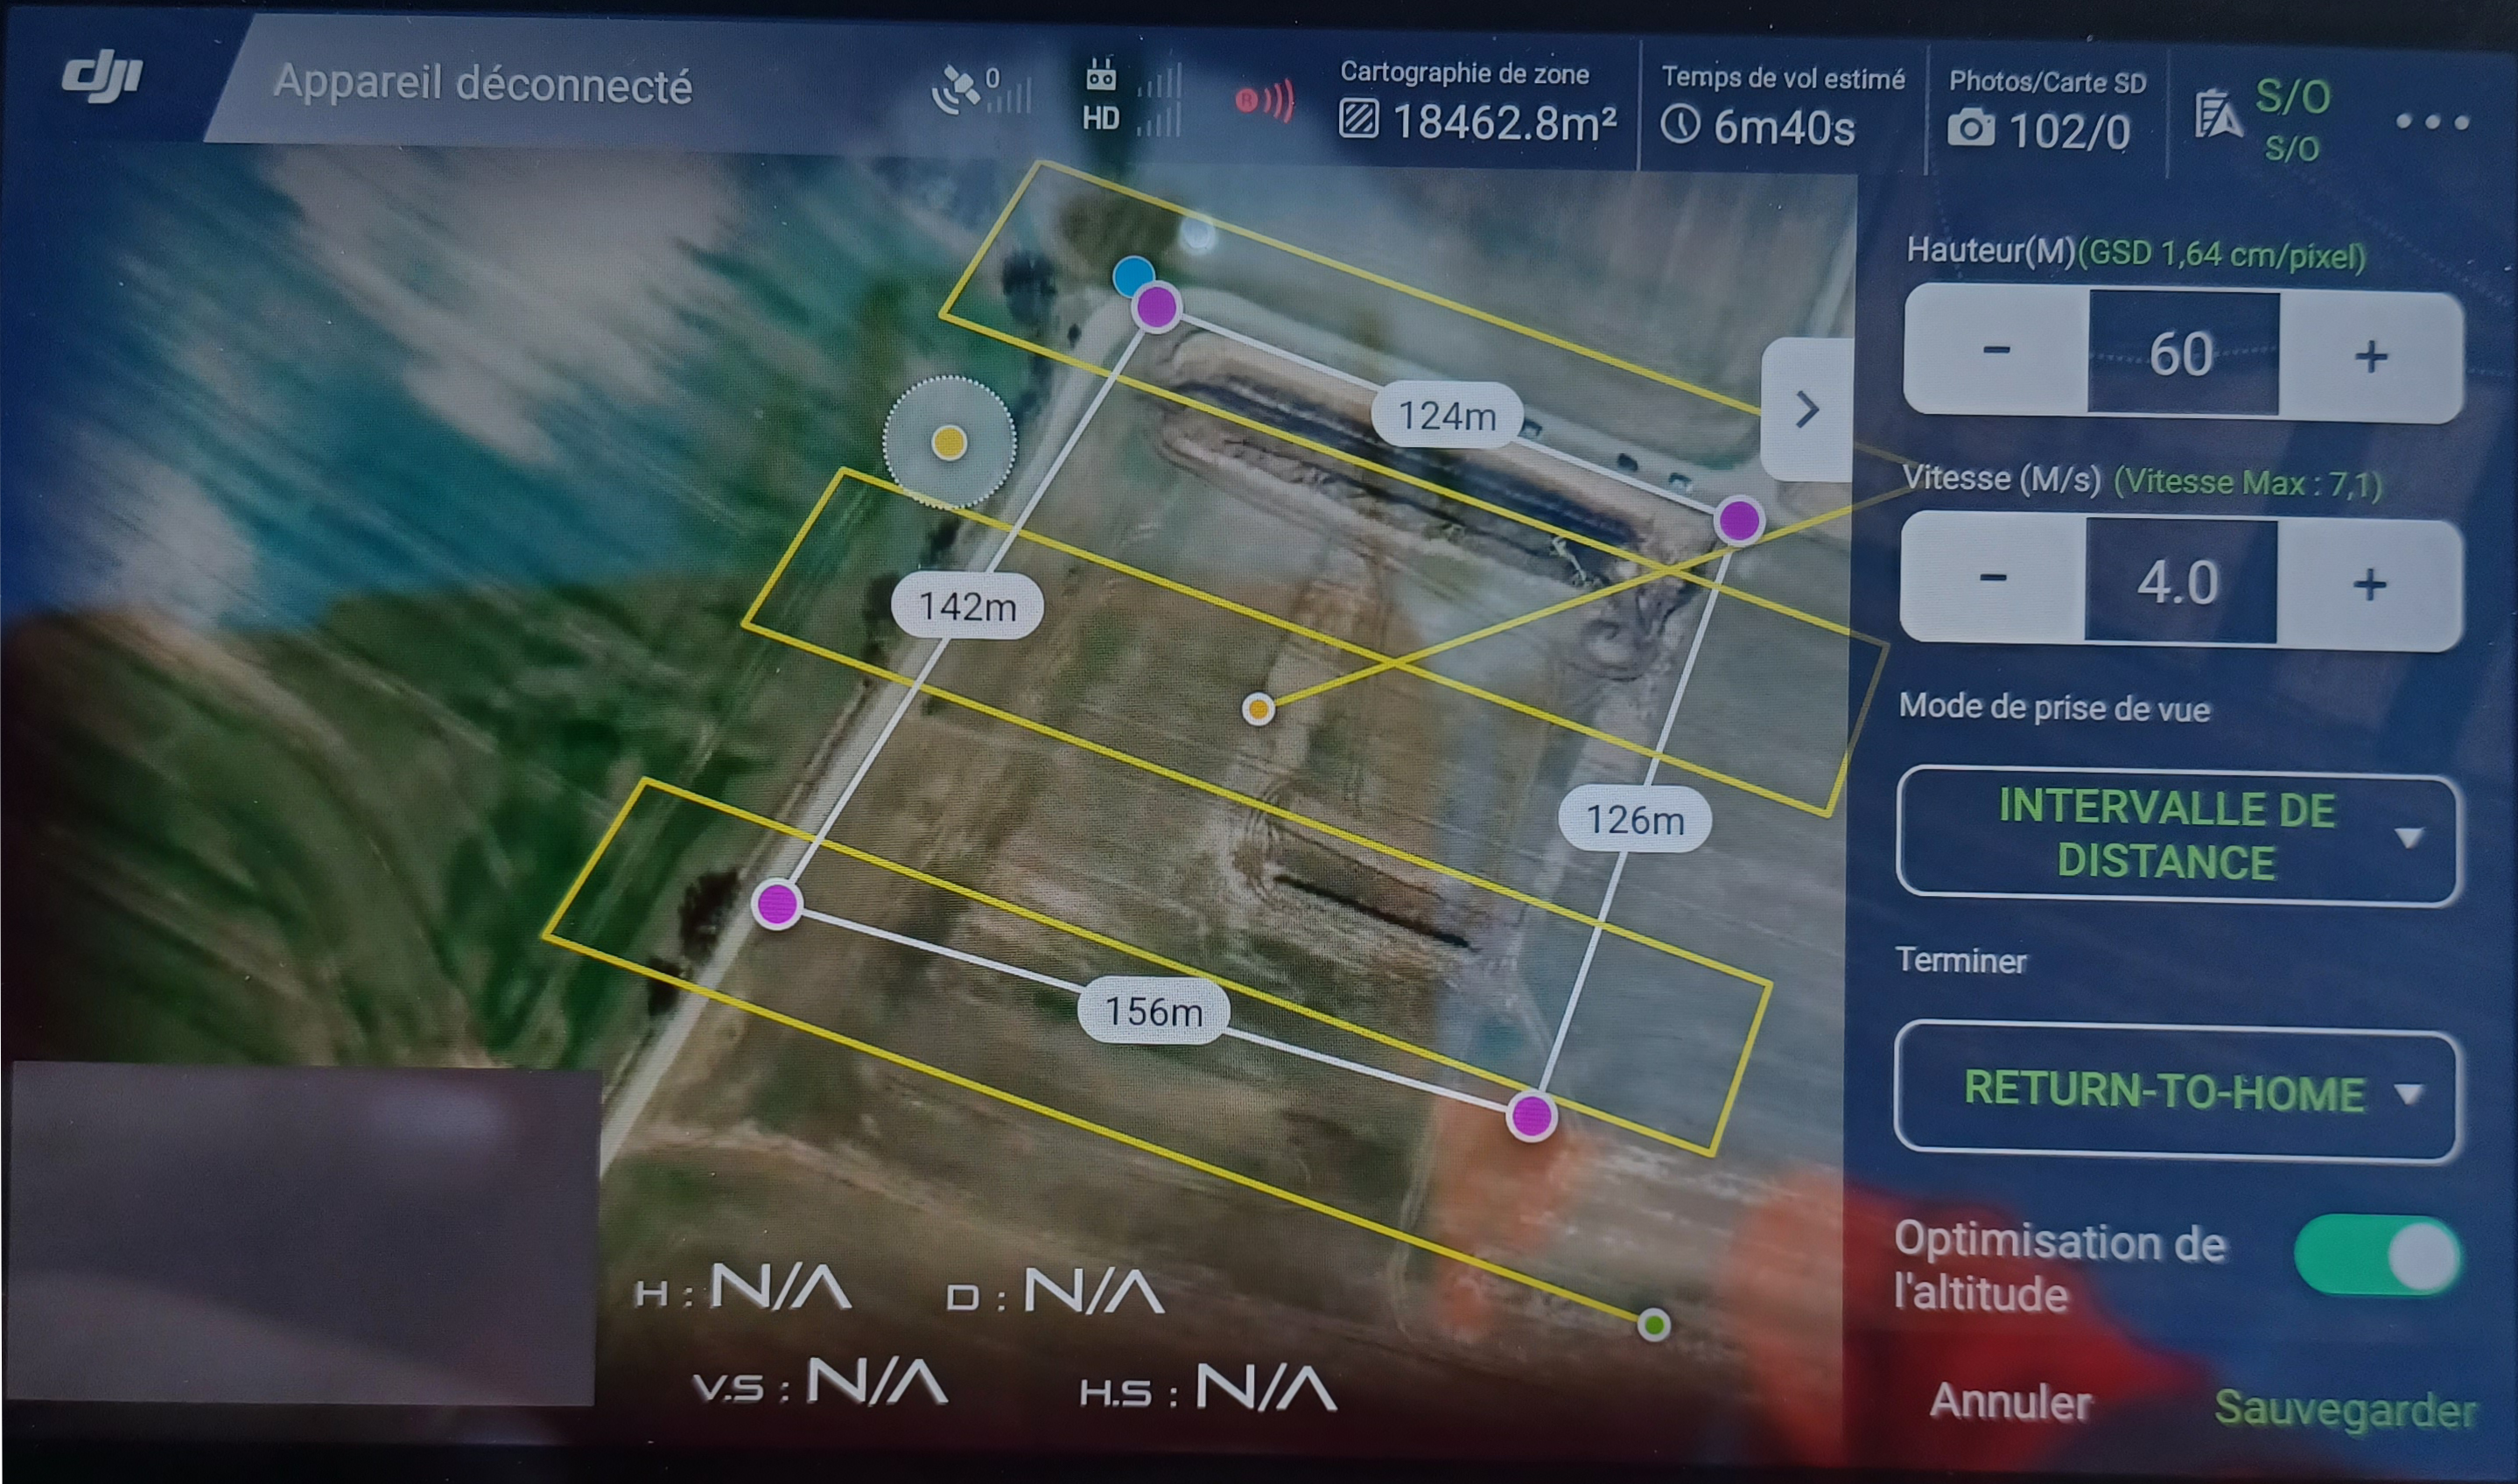
- The height of the flight not beyond 80m (for a better definition put between 50 and 60m)
- Decrease the speed of the drone by about 10% (even if the speed of the drone automatically decreases when changing the height of flight)
- Put distance interval and NOT time interval
- Check Return To Home (RTH) box after finish
- Enable altitude optimization: This option will make oblique pictures at the end of flight. It’s help for the photogrammetric geometric accuracy
- Keep 0m for the relative height

- Go to photo settings, change nothing, except for the white balance if desired (Sunny or Cloudy). Check that the angle of the camera is at -90
- Go to advanced settings:
- For a 3D flight (For example: survey a stock) put 70% in horizontal overlap and 80% in vertical overlap.
- For a 2D flight (For example: make an inventory of a road) put 60% and 70% for the horizontal and vertical overlap respectively.
- Keep Auto for setting margin
- Once all the parameters are set, click on save button and name the flight plan.
¶ On the field
¶ GCP survey
For control of the photogrammetric survey, you need GCP (Ground Control Point).
Place a minimum of 3 black&white targets uniformly over the area to be surveyed and use a GNSS pole to survey the center of it. Never put the same name for 2 GCPs.
For avoid boring pinning the target in images(in processing step) , we have a algorithm who detect automaticaly these GCP but it's need to be black&white. If you flight at 60m/80m above ground you can pick these one : Here
¶ Positioning of station D-RTK2
You have 2 methods to georeferenced your D-RTK2 station.
¶ On known coordinate point
- Place the D-RTK2 on a known point, without masks and close enough to the area to be flown.
- Transform the coordinates in WGS84 Lat-lon (Eg. EPSG:4326).
- Add 1m80 (height of D-RTK2 pole) to the Z and keep it in geodetic altitude, don’t transform in ellipsoid height.
In Deutschland you can use: This link
In the parameters enter "GK4" and "GEO_WGS84" for the projections. Select "Verschiebegitter DHDN_WGS84_Beta2007" for the transformation
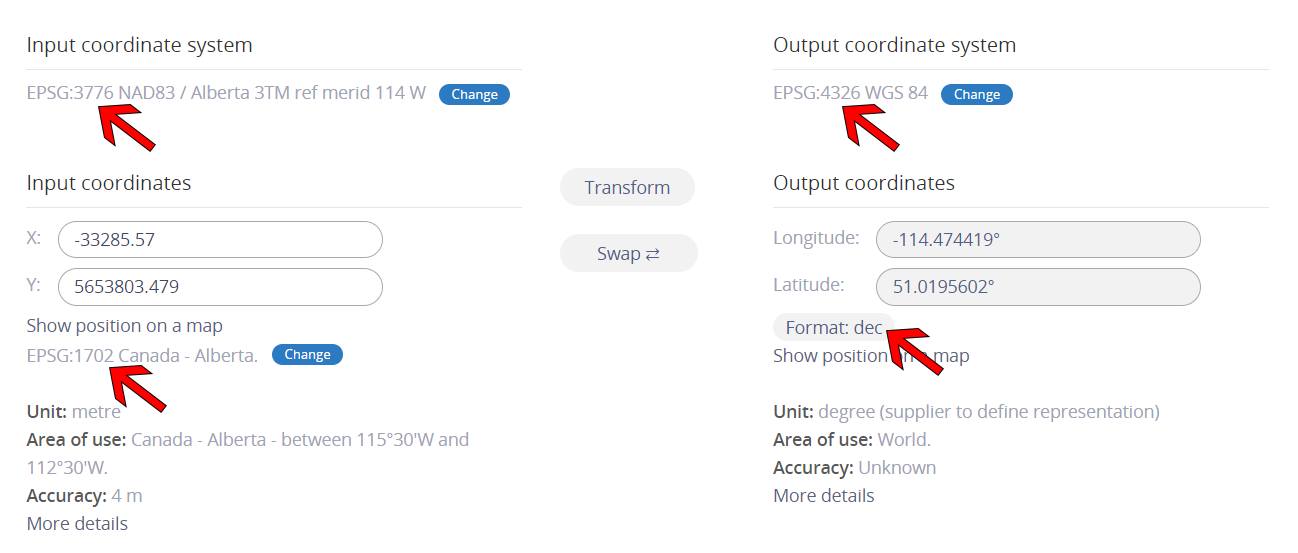
In Alberta Canada you can use: This link
Don't touch at the parameters, check if it's convert EPSG:3776 to EPSG:4326 with EPSG:1702 AB_CSRSV4grid and make output coordinates in decimals.
¶ Set a known point
With a GNSS pole you can set a point and place your D-RTK2 on it. And make the same procedure as above.
¶ Drone preparation
Set up the drone on its mat on a flat and clear area. Check that the drone camera is not touching the ground. Always turn on the remote control first and leave the drone off.
Note: to turn on the remote control, press the power button once short and once long. Same for the drone.
¶ Controller preparation
- On controller click on menu, SDCard icon, flight plan drop-down list, and start.
- The flight plan is displayed. Turn on the drone and wait for the synchronization to be done.
- Click on the 3 dots on the upper right corner
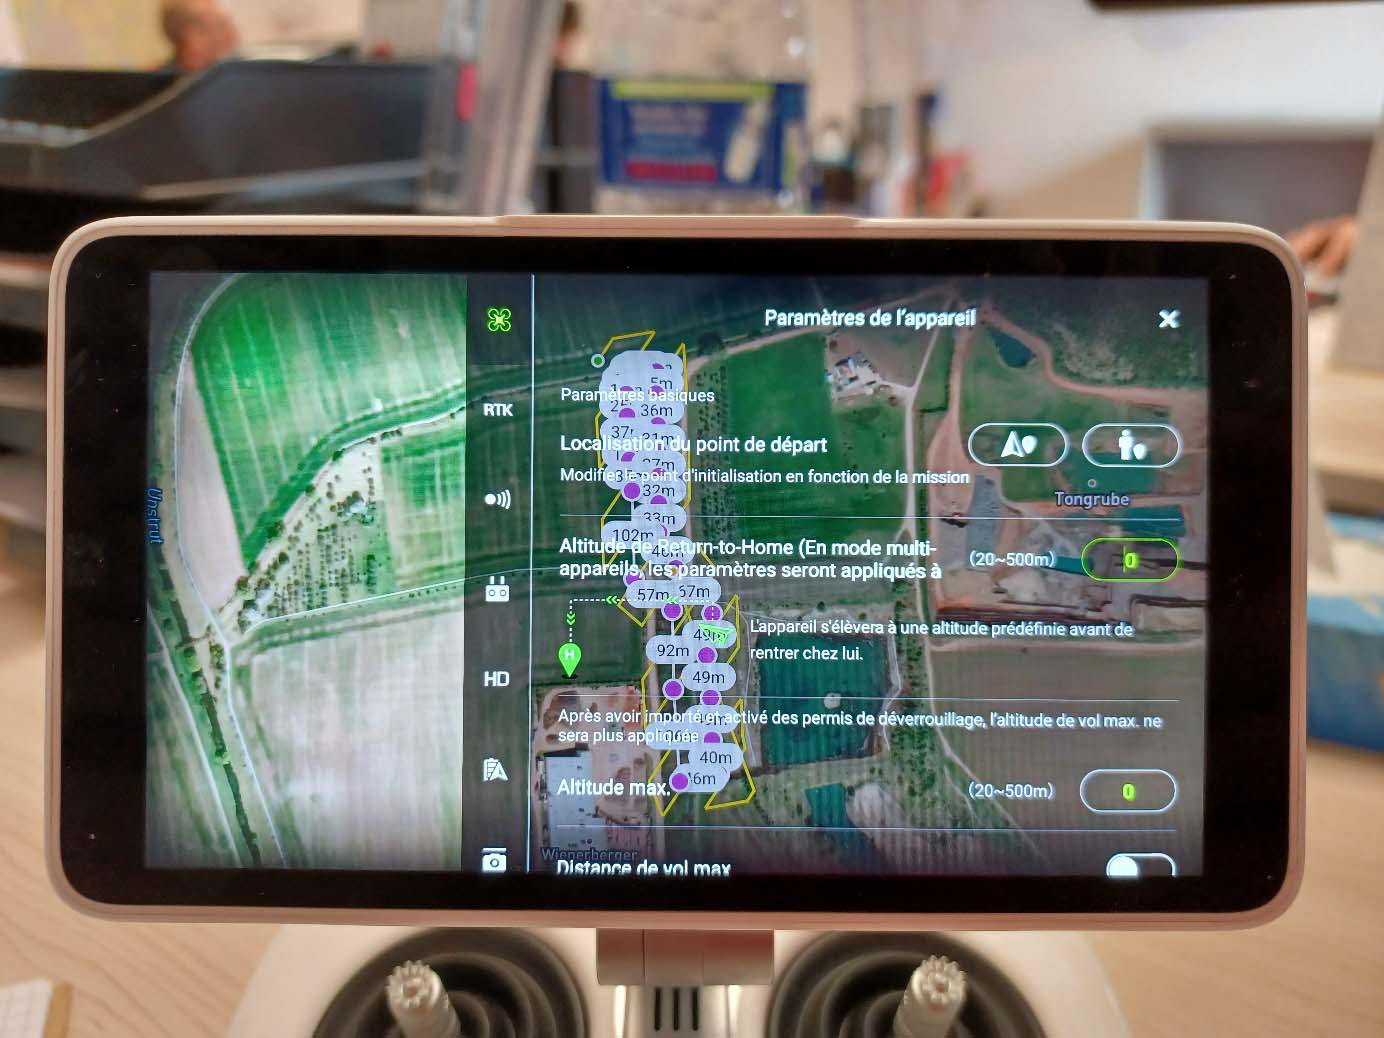
- On the first tab of parameters:
- Put 50 m for the RTH altitude unless there is an obstacle higher of this height (ex: crane)
- Enter 120 m for the maximum altitude
- Enable Max Flight Distance
Let other parameters by default
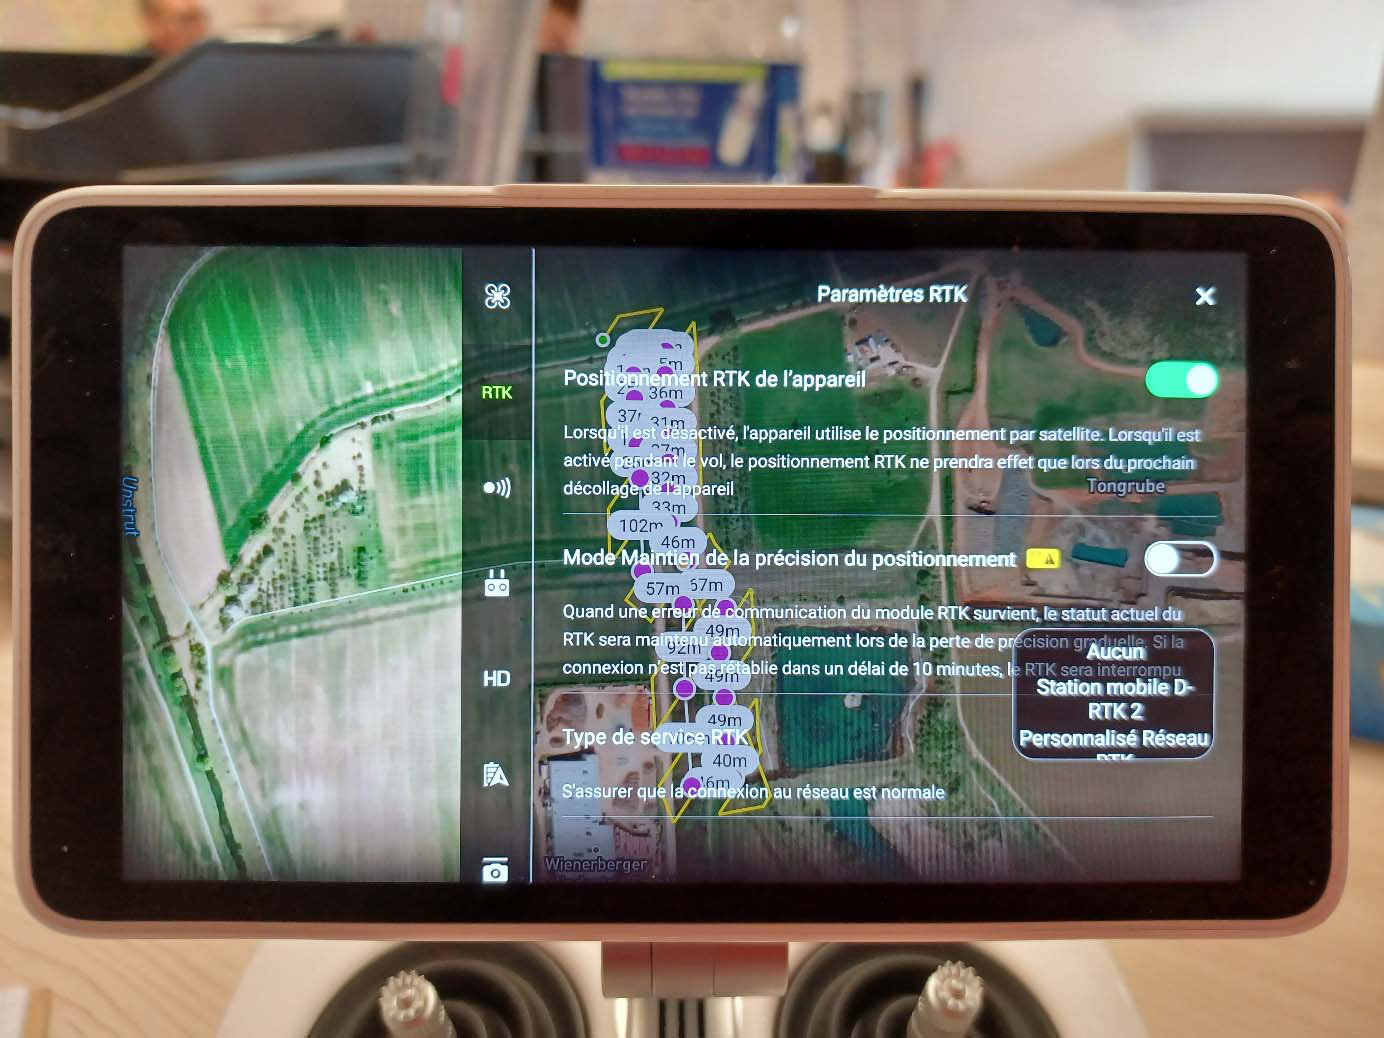
- On the RTK parameters tab :
- Enable RTK device positioning
- Disable “Maintain Positioning Accuracy” mode
- Select “D-RTK2 Mobile Station” for RTK service type
You can use an NTRIP caster here, but this feature was not tested for the moment.
- On the same tab go “advanced parameter” at the bottom.
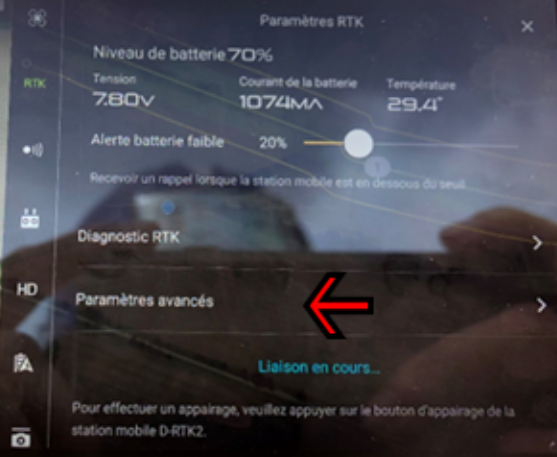
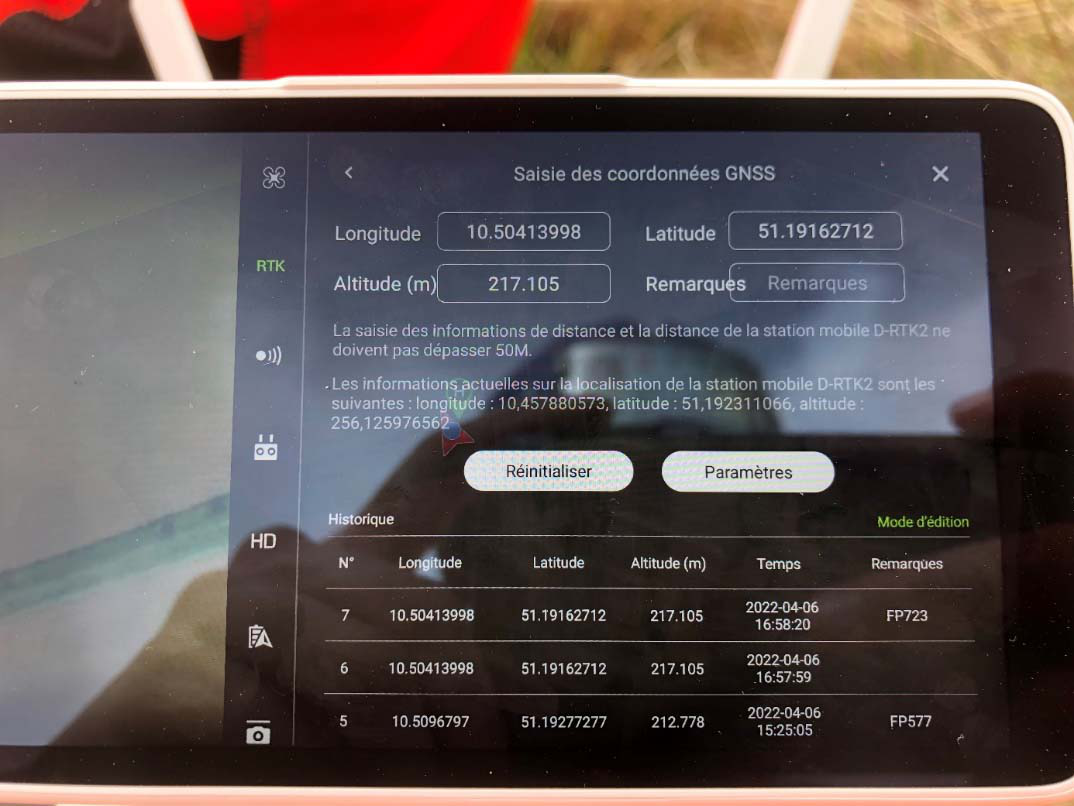
- Go to enter GNSS coordinates

- Type de latitude, longitude and Z of the point. And click to save/parameters button.
- Don’t forget to add 1m80 to the Z (height of D-RTK2 pole)
- Add 7 digits to obtain centimeter accuracy
- Don't ignore message from bottom of screen after cliking on "parameters", if you enter a wrong coordinate the software tell you it's not correct!
You can fil the remark field by naming the point. It will appear in the list below and can be used later (future survey).
- Go back to flight plan and verify that the ribbon at the top it’s RTK mode and drone and D-RTK2 is connnected. If the app bug, type on “DJI” logo (upper left) and reload your flight plan.
- Now you can clik on invoke and swipe to the right to start the mission
- Keep your hand on the remote control and ensure that the drone is visible. Before the drone lands, set the gimbal angle to 0 to avoid getting too much dust on the camera lens when landing.
¶ Conclusion
In this document we have seen how to create a flight plan with different parameters depends on the type of survey.
And we have described a “check list” before flight.
This document is in continuous development, don’t hesitate to send us any bugs/improvements.